Connecting Excel to Microsoft SQL: A How-To Guide
Connecting Excel to a Microsoft SQL Server database is a straightforward process, enabling you to import, analyze, and manipulate SQL Server data directly within Excel. In this blog, you can find a step-by-step guide to do that.
Prerequisites
- Microsoft Excel: Ensure you have Excel installed.
- SQL Server Information: You need the server name, database name, and authentication details (username and password if using SQL Server authentication).
Detailed Steps to Connect Excel to Microsoft SQL
By following the following detailed steps, you can effectively manage your Excel data connections, ensuring that your workbook remains connected to the correct data sources with the appropriate security and access settings. Here is how to do it:
Access Data Source Settings
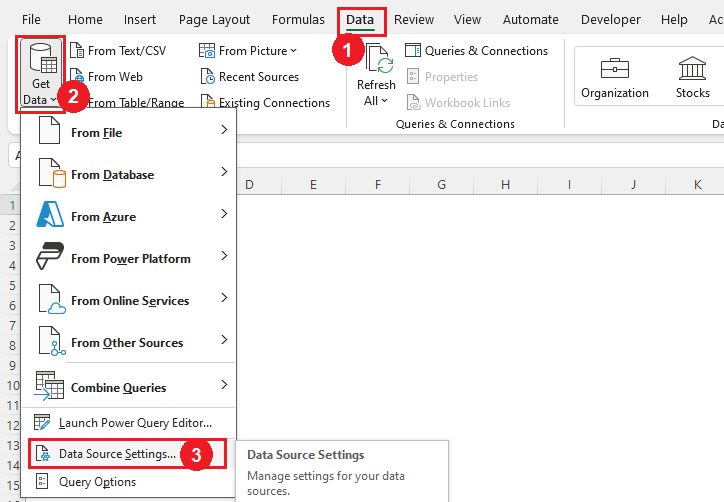
- Open Excel Workbook: Start with the Excel workbook that has the existing data connection.
- Data Tab: Navigate to the ‘Data’ tab on the ribbon at the top of Excel. This tab contains tools for working with external data.
- Get Data: Click on ‘Get Data’. This button is usually part of the ‘Get & Transform Data’ group. It is used for setting up and managing data connections.
- Select Data Source Settings: From the dropdown, choose Data Source Settings. This opens a new window showing all current data connections in your workbook.
Boost your productivity by getting a free consultation from Excel experts, and discover tailored solutions to optimize your data management and analysis.
Change Source
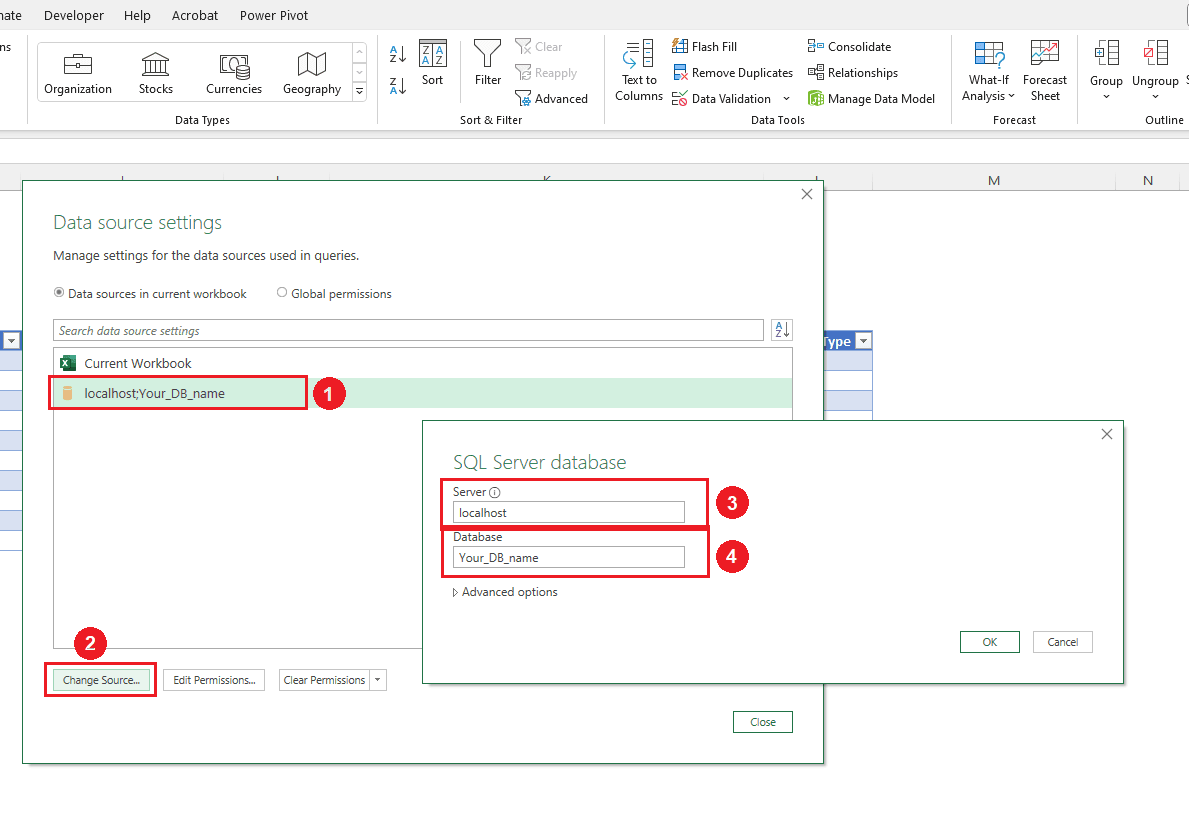
- Choose Data Source: In the Data Source Settings window, you’ll see a list of data sources that your workbook is connected to. Select the one you need to modify.
- Change Source Button: Look for the Change Source button, usually located at the bottom of the window. Clicking this will open a new window where you can edit the details of your data source.
- Update Server and Database: Here, you’ll find fields for the Server and Database. Update these fields if you’re changing to a different server or database. This step is crucial when the database has been moved or renamed.
Permissions and Credentials
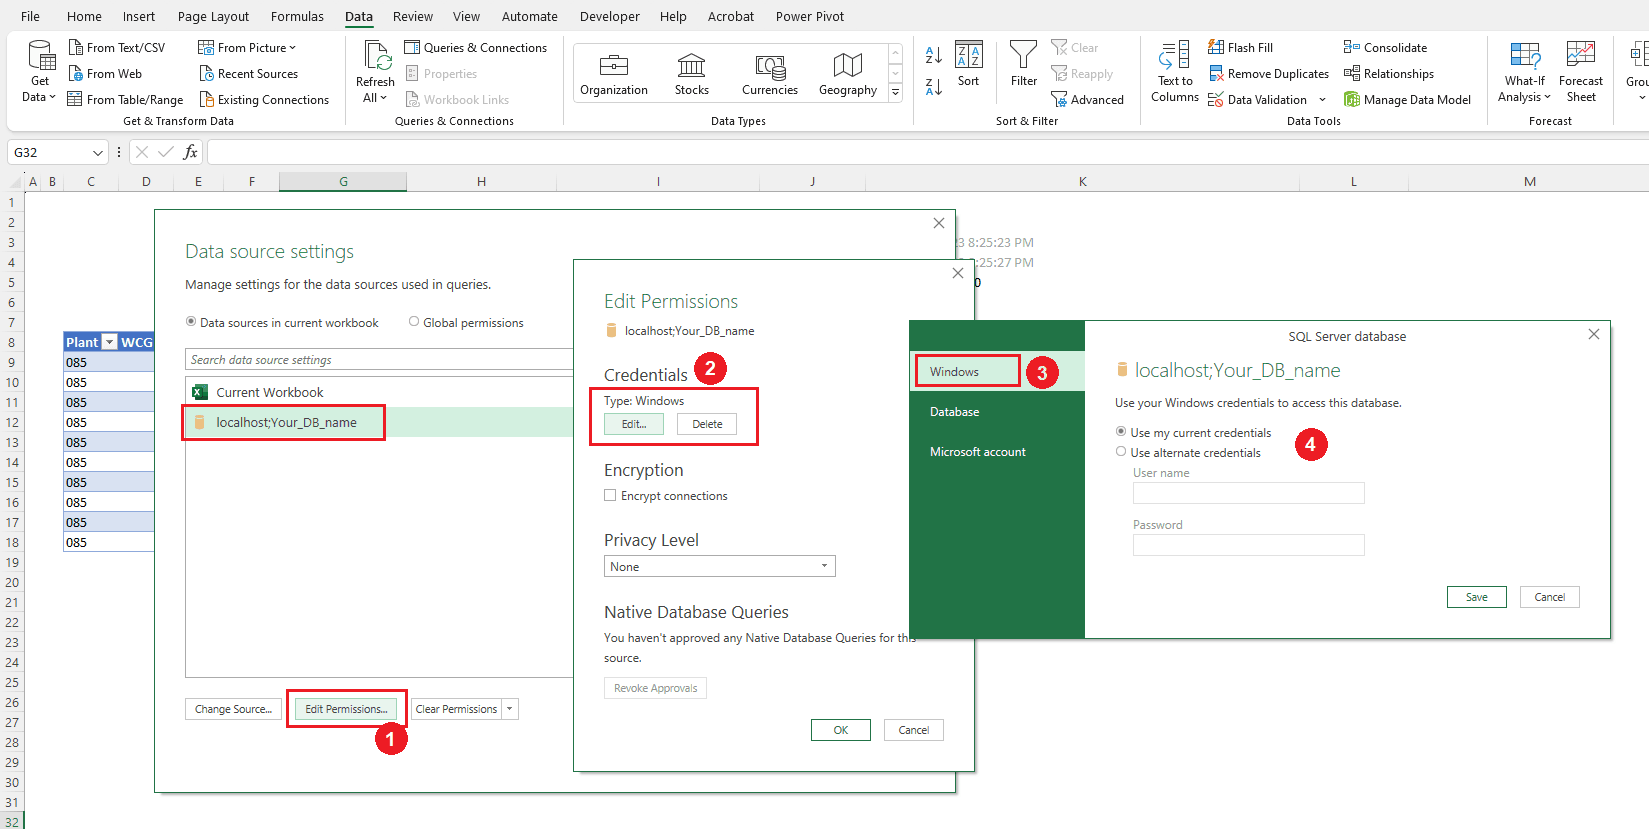
- Edit Permissions: Back in the Data Source Settings window, find and click on the ‘Edit Permissions’ button. This is essential for managing how Excel connects to the data source in terms of security and access rights.
- Credential Section: In the Permissions window, there’s a section for credentials. This determines how Excel authenticates with the data source.
- Edit Windows Credentials: Find the ‘Edit’ button in the ‘Type: Windows’ section. Clicking this opens a window where you can choose and edit Windows credentials.
Edit Windows Credentials
- Current vs. Alternative Credentials: You’ll have two options. The first is ‘Use My Current Credentials’, which is straightforward and uses the credentials of the logged-in Windows user. The second option, ‘Use alternative credentials’, allows you to enter a different username and password. This is useful when you have specific credentials for the data source that differ from your Windows login.
Database Permissions
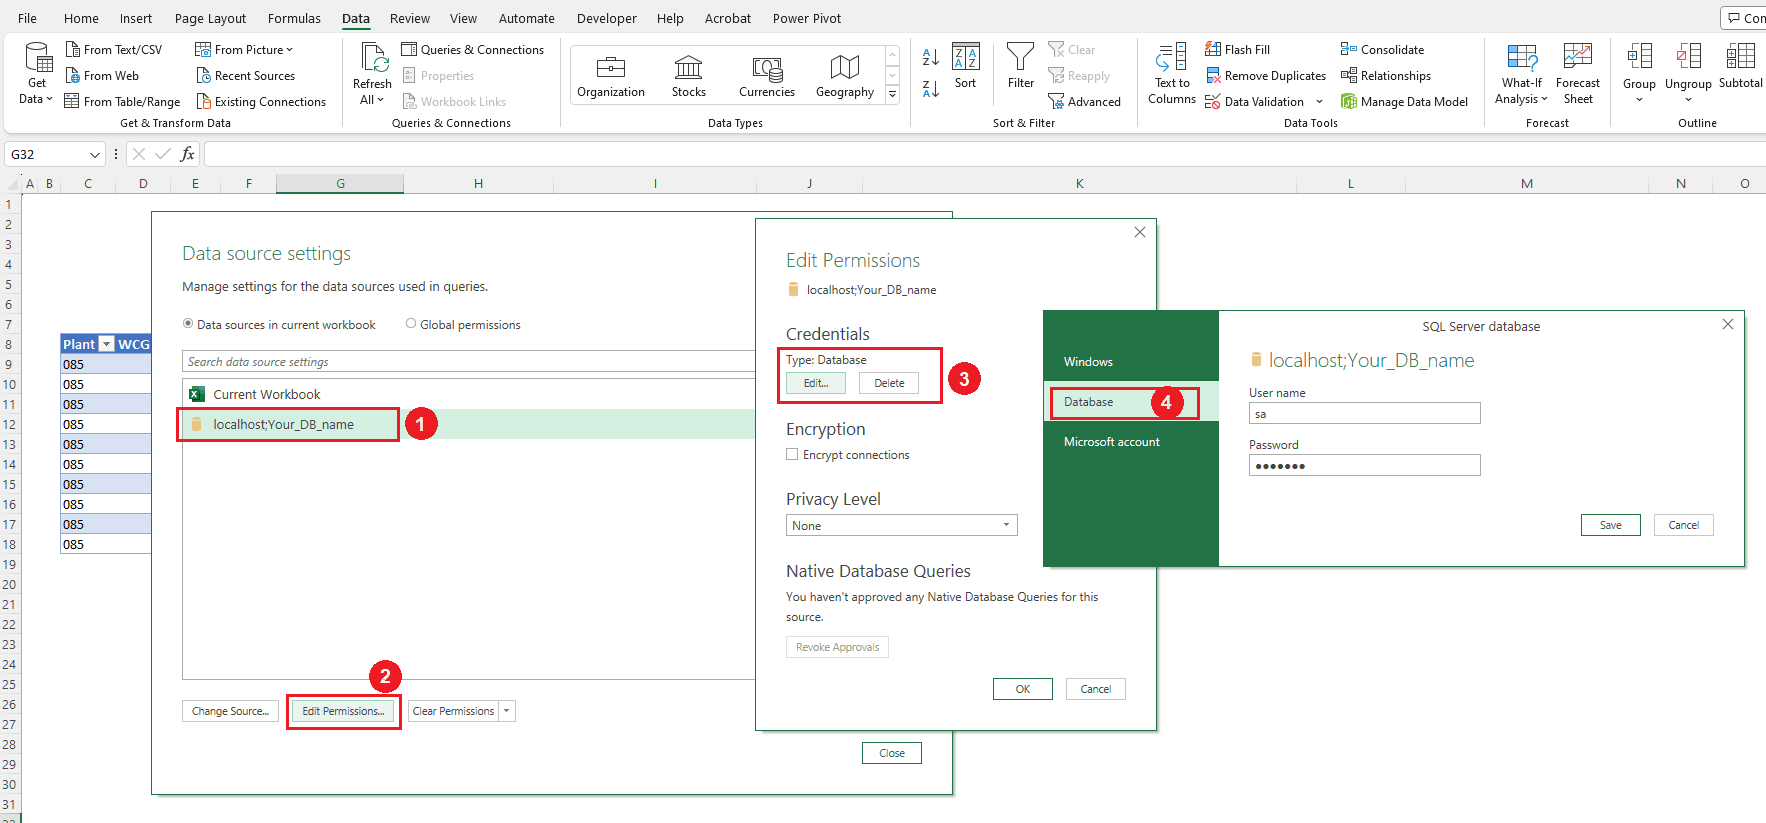
- Database Button: Below the Windows credentials option, there’s a ‘Database’ button. This is where you can set database-specific permissions.
- Enter Database Credentials: Here, input the username and password for the database. This is particularly relevant if the database uses a different authentication method from the Windows credentials.
Enhance your software capabilities with our customizable Add-In Solutions, seamlessly integrating new features to meet your business needs.
Save Changes
- Apply and Save: After making all the necessary changes, click ‘Save’. This will update the data connection settings in your Excel workbook.
- Test the Connection: It’s a good idea to refresh the data or test the connection to ensure that the new settings are correctly configured and that Excel can successfully retrieve data using the updated settings.
Additional Considerations
- Version Sensitivity: Be aware that the exact steps can vary depending on the Excel version and the specific data connection type.
- Security Best Practices: Always follow best practices for data security. Avoid sharing or exposing sensitive credentials and ensure you have the proper authorization to modify these settings.
- Regular Updates: Regularly review and update data connections and credentials to maintain secure and efficient access to your data sources.
Conclusion
Through step-by-step instructions and practical tips, you’ve learned how to establish connections, import data, execute queries, and leverage the full potential of SQL within Excel. Armed with this knowledge, you’re well-equipped to streamline your workflow, enhance data analysis capabilities, and unlock deeper insights from your SQL databases—all directly within Excel.
Our experts will be glad to help you, If this article didn’t answer your questions. ASK NOW
We believe this content can enhance our services. Yet, it’s awaiting comprehensive review. Your suggestions for improvement are invaluable. Kindly report any issue or suggestion using the “Report an issue” button below. We value your input.


