How to Create Excel Reports Using Power BI
I love automation! I know many of you do as well. Who likes to do repeated tasks every single day anyway? Especially the ones that can be done automatically!
One of the things that you can automate is Excel reports. If you work with a lot of data and receive a bunch of them every day, we suggest you learn how to automate Excel reports using Power BI. If you don’t know anything about automation, there’s nothing to worry about. We will be with you step by step to teach you everything you need to know about automating Excel reports. Ready?
3 Steps to Automate Excel Reports in Power BI
We will do the process in 3 main steps. Before you start:
- Make sure that you have a Power BI account.
- Sign in to your Power BI account so you’ll have access to all the features we’ll talk about in this tutorial.
Step One: Saving the attachments to OneDrive
Go to app.powerbi.com and sign in to your account. Click on the top left dots and select the Power Automate icon.
On the left side, click on Create. So here, we can either create a new template from scratch or choose one. We need a template to save attachments to One Drive. The template we need is Office 365 Email attachments to specified OneDrive for business folder.
Click on it; then you’ll see a new page like this:
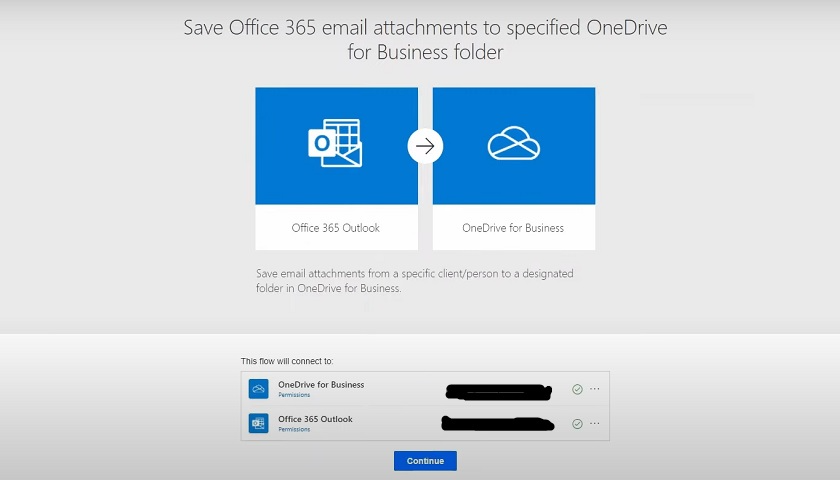
You need to sign in to your accounts and get the green ticks. Then click on Continue; this is what you’ll see in the new window:
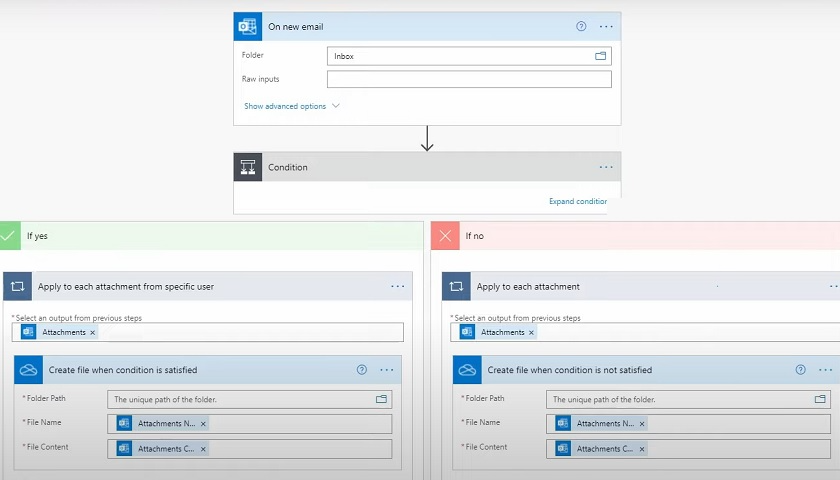
In the Condition section, you can set a condition like, for example, subject is Daily Report. If the condition is true (meaning you receive an email with this subject), the attachment will be saved in OneDrive.
We don’t need the “If no” side of the condition. You can delete it.
The first step is now done. You can test the flow using the Test button to ensure it works.
Step Two: Notification Flow
Click on Create on the left panel and select Automated Cloud Flow.
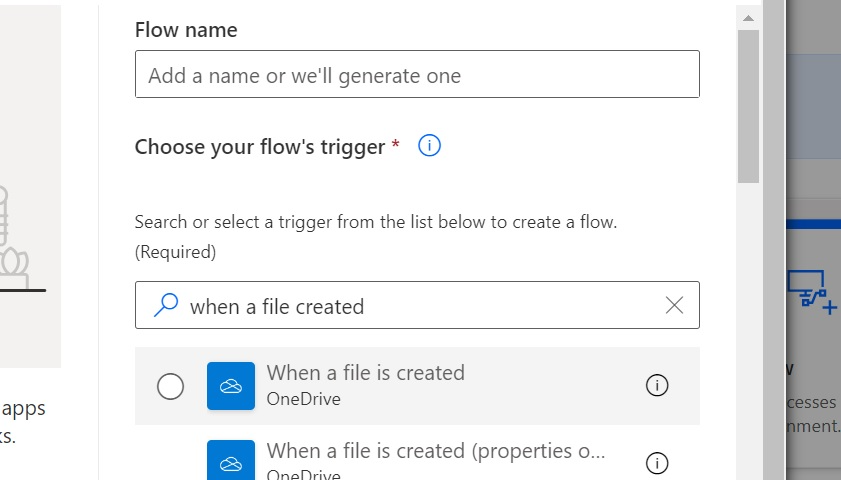
Choose a new name for your flow; otherwise, one will be generated automatically.
Now we need a trigger to run the flow. We want to be notified when a new file is saved in OneDrive. The trigger we choose here is “When a file is created OneDrive.”
After clicking on Create, you must select which folder the file should be saved in.
Add a new step.
Select Teams as a connector and Post a message as Flow bot to a user as an action.
On the new window, specify the recipient and the message you want to send them.
Save the flow. You can now test your flow and make sure it works properly.
Step Three: Power BI Data Refresh Flow
This is the last step of our tutorial. Click on Create and select Scheduled cloud flow.
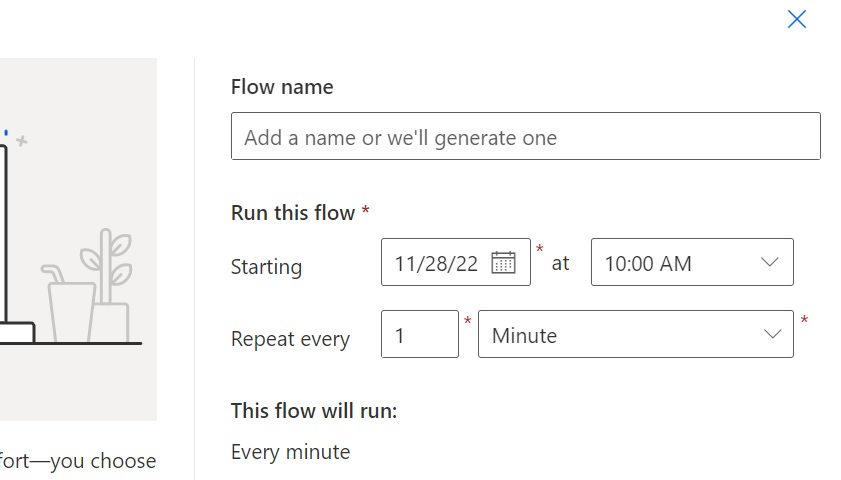
Choose a name and date you want the flow to run, then select Create.
Add a New Step, select Power BI as the connector, and Refresh dataset as the action.
Now you just need to select Workspace and Dataset.
As the final step, we want to let the users know the data is updated.
So add a new step.
Select Microsoft Teams and Post message in a chat or channel.
Now fill out the new form and specify the channel, team, and message that you want it to send.
Congratulations! You’re all done now. But to make sure that everything is working the way you want, test your flows.
Once you’ve automated your Excel reports using Power BI, you might want to perform more detailed analyses directly within Excel. For a comprehensive guide on how to analyze Power BI data in Excel, check out our article on Power BI Analysis in Excel.
Our experts will be glad to help you, If this article didn’t answer your questions. ASK NOW
We believe this content can enhance our services. Yet, it’s awaiting comprehensive review. Your suggestions for improvement are invaluable. Kindly report any issue or suggestion using the “Report an issue” button below. We value your input.
About the Author: Hajir Hoseini
document.getElementById(“review-notice”).remove();
document.getElementsByTagName(“hide-notice”)[0].parentNode.remove();
}


