How To Share An Excel File
Excel 2016 and later versions provide a useful option to share your workbook easily and edit it at the same time by multiple users. This tutorial explains how to share an Excel workbook, step by step.
Use OneDrive to share Excel
OneDrive, which is Microsoft’s cloud product, lets you save your files and collaborate on them with others.
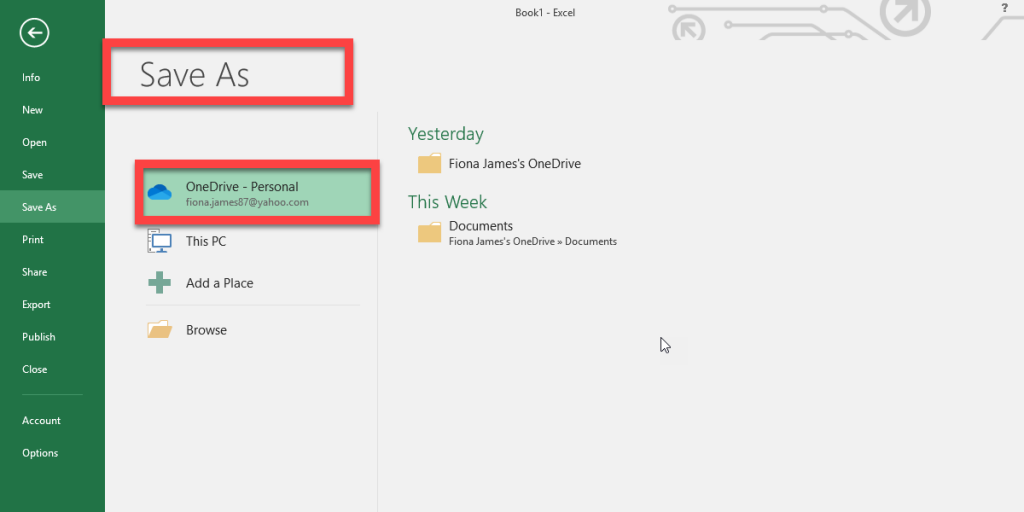
To add an OneDrive place to share your Excel worksheet go to the File tab, click on the Open, Save or Save as (all of these features has this option), click on the Add a place, select OneDrive or OneDrive for Business (OneDrive for Business is a particular paid version), and sign in with your Microsoft account. (according to video 1)
Video 1- How to add a OneDrive place
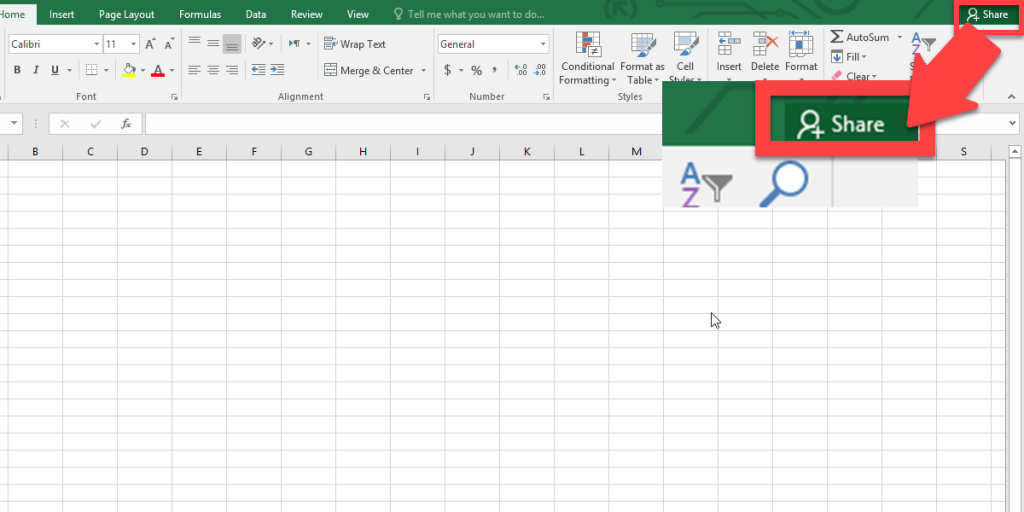
To invite your colleague and share the file, click on the Share tab on top left of the menu tab.
Then the Share pane will open on the left side of your worksheet. If you haven’t saved your file on the OneDrive yet, Excel asks you to save and copy your data to an online location by the “Save to cloud” button.
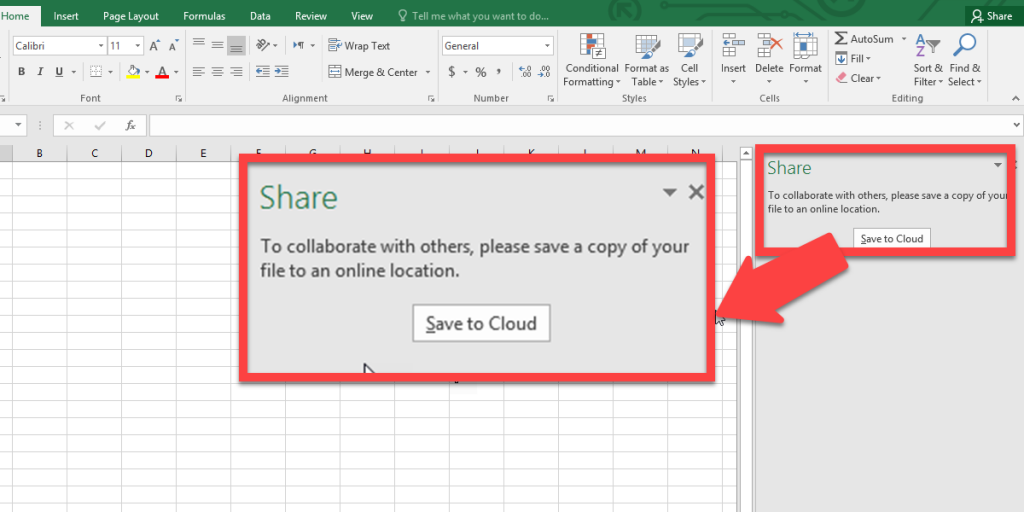
By clicking on the Save to Cloud button, you can choose OneDrive to save the file. Select a Location to save the data, enter a name, and press Save.
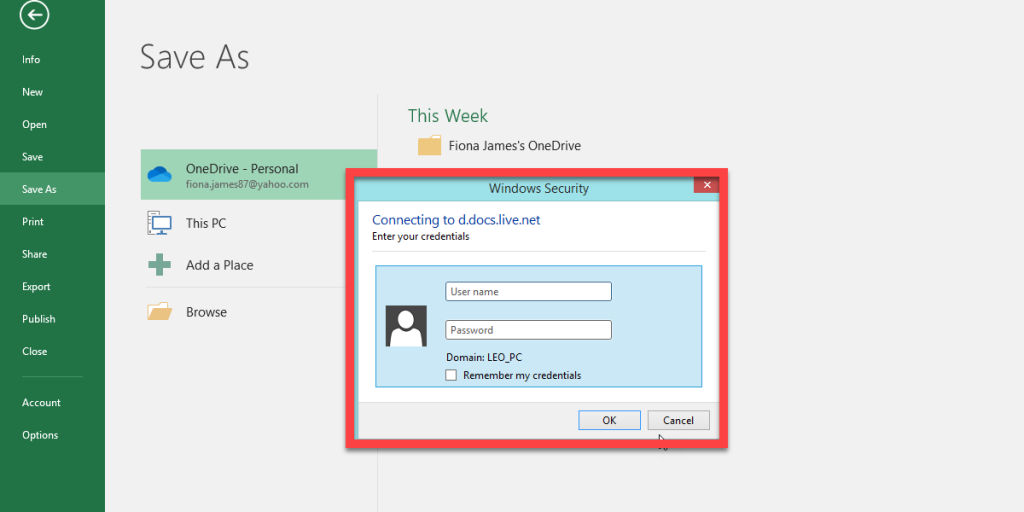
If Windows security appears, enter your Microsoft email and password.
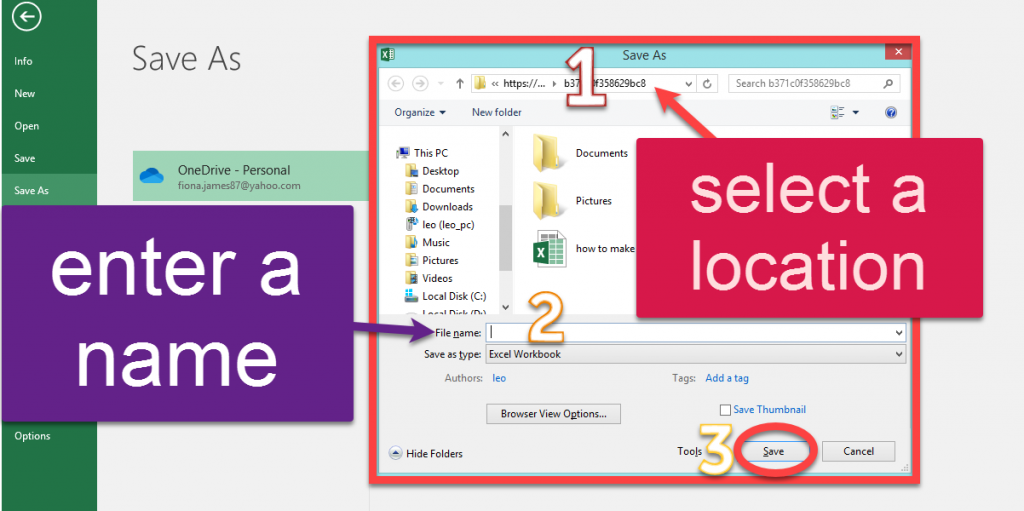
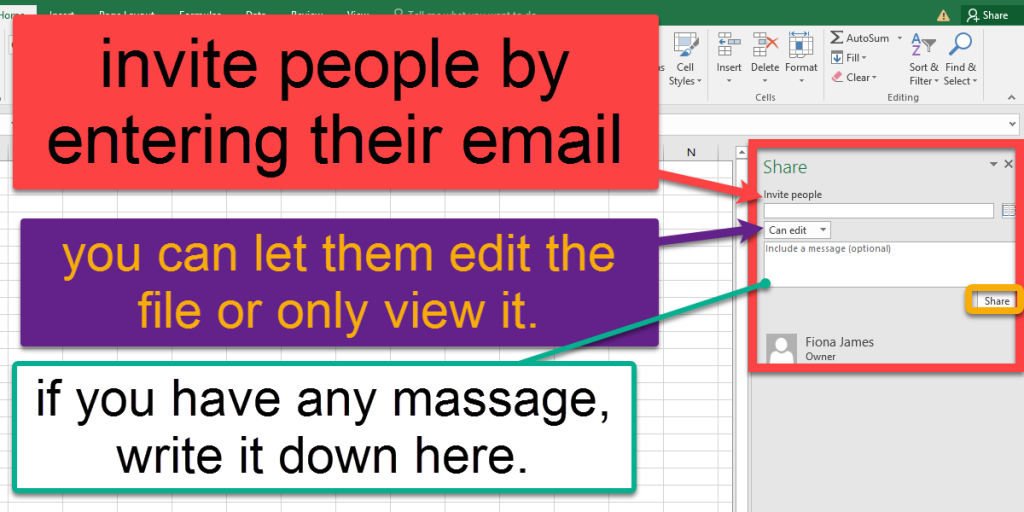
Now you can share the file with the people you want. Click on the Share tab again. Enter their email to invite them. You can also let them edit the data or view it only. There is a box to write down a message if you have any. (this is optional.)
Boost your productivity by getting a free consultation from Excel experts, and discover tailored solutions to optimize your data management and analysis.
Use Share Workbook to Share Excel 2016
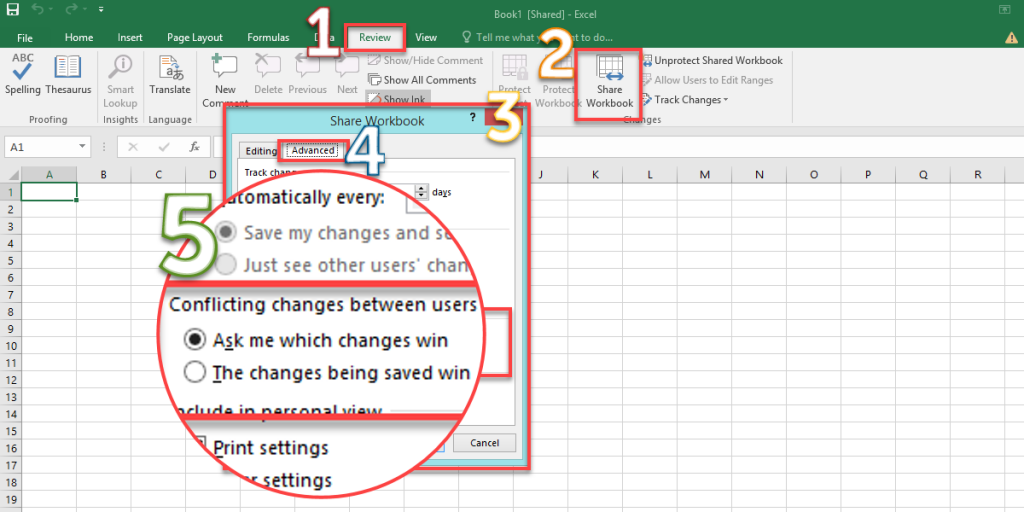
Another way to share Excel worksheet is the Share workbook feature. If you don’t want to share your Excel online, use this option from the Review tab on the tools menu.
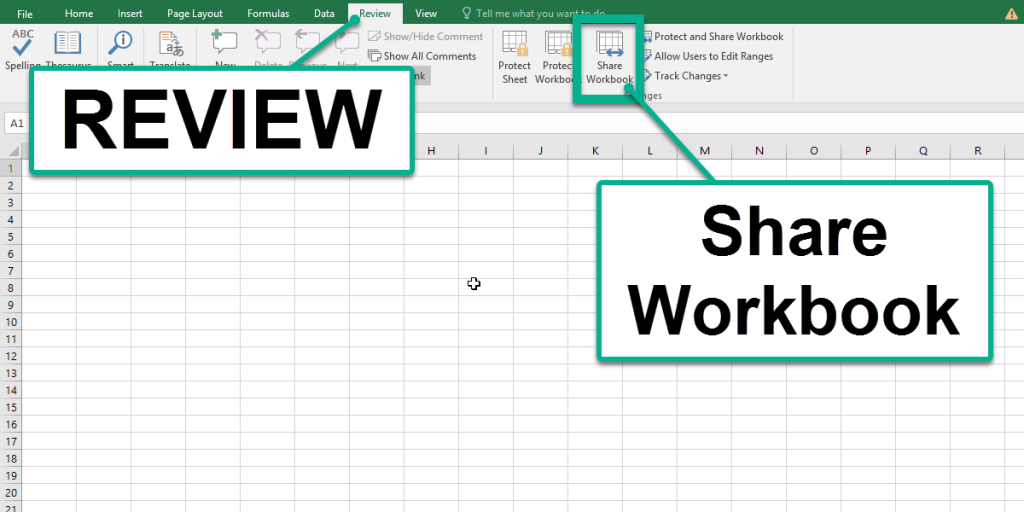
Click on the Share Workbook. Then the Share Workbook dialogue box appears. On the Editing tab, choose the Allow changes checkbox.

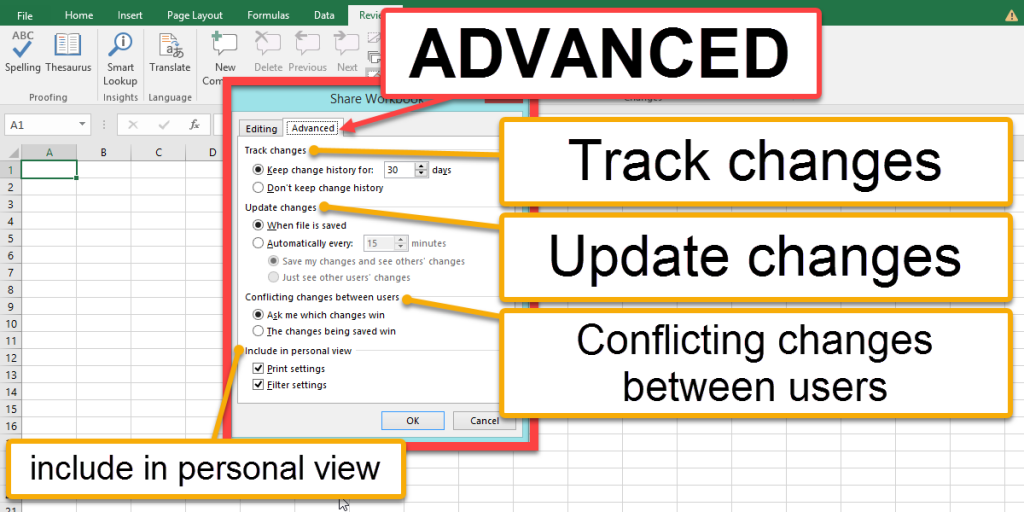
There is an Advanced tab to assess how changes should be handled.
Now Excel asks you to save the file. If you do these steps right, [Shared] passage will appear next to the filename.
![If you share the Excel file right, [Shared] passage will appear next to the filename](https://bsuite365.com/wp-content/uploads/the-shared-passage-1024x512.png)
Notice you can’t share the Excel file that contains tables or XML maps by the Share Workbook.
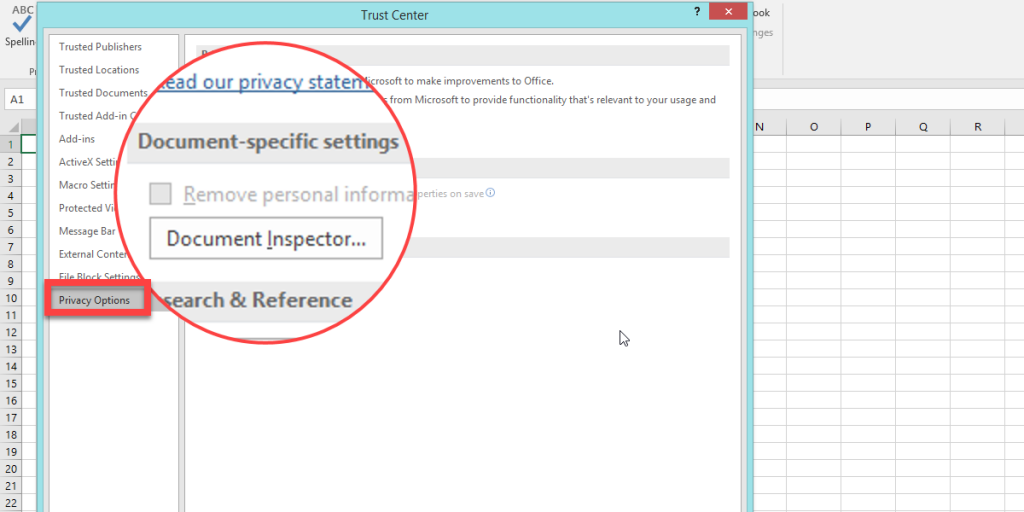
If Excel doesn’t let you share the file, check the trust center setting.
- Click on the File from the ribbon.
- Choose the Options.
- Click on the Trust Center.
- Go to the Trust Center Setting.
- Click on the Privacy Options and make sure the Remove personal information from file properties on save checkbox is disabled.
Also, you can protect change tracking with a password. The password must be chosen before sharing the workbook. Entering a password is optional, but if you want to protect the worksheet, it’s better to do it.
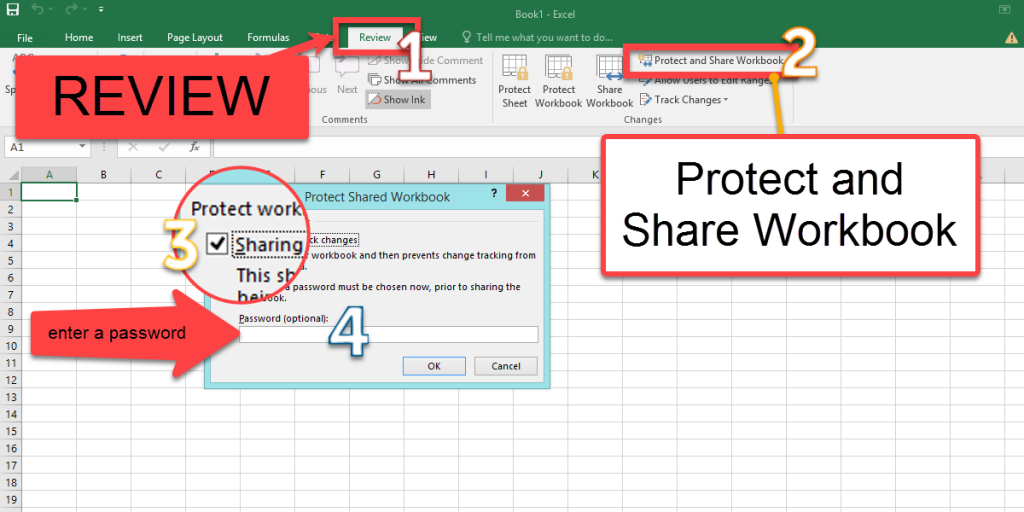
So to protect and share workbook follow these steps:
- Go to the REVIEW tab from the ribbon.
- Click on the Protect and Share Workbook from the Changes group.
- Choose the Sharing with track changes checkbox.
- Enter a password and press OK. (if you can not enter the password, unshare the workbook, then protect it with a password.)
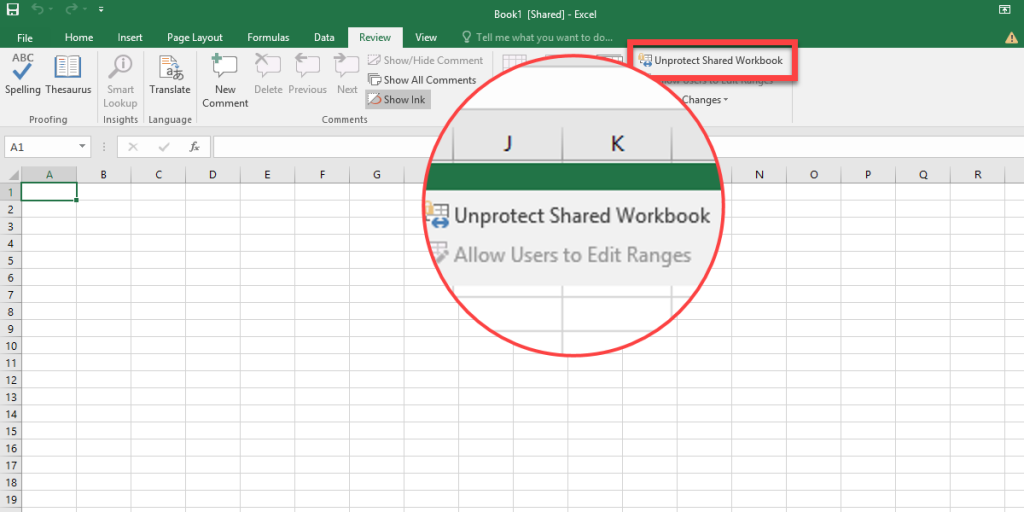
To unprotect the workbook, click on the Unprotect Shared Workbook.
Enhance your productivity and efficiency with our comprehensive Excel Automation Services, designed to simplify complex tasks and save you valuable time.
Shared Excel File Limits
When you share a workbook, some options will be disabled, such as:
- Hyperlink
- Subtotal tools
- Data validation
- Conditional formatting
- Merging
- …
Therefore you can enable them before sharing the workbook and use them while you share the file.
Edit the Shared Workbook
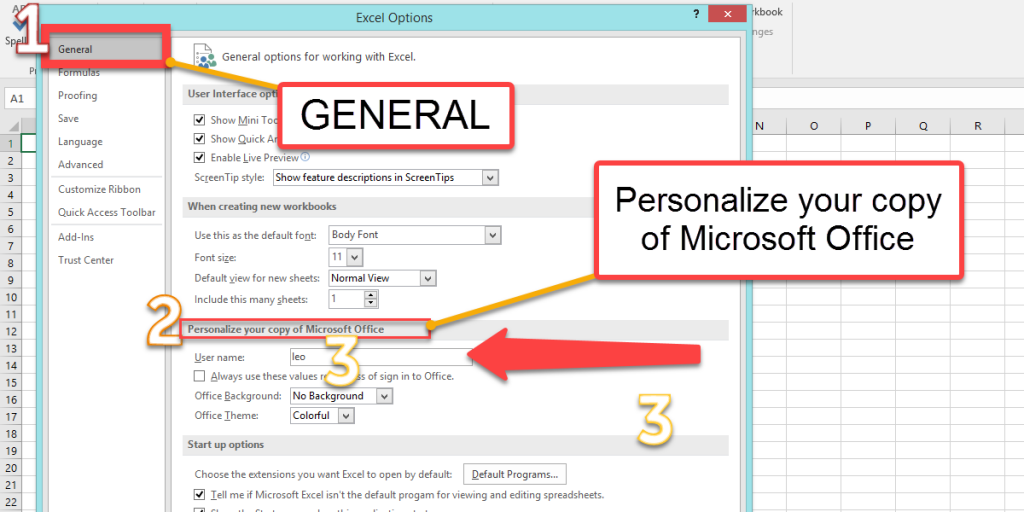
If you want to know accurately that who edited the file, ask everyone you shared the data with to do these steps:
- Go to the File from the ribbon.
- Select the Options.
- Select the General from the menu.
- Write your name in the User Name box on the Personalize your copy of Microsoft Office.
- Press OK.
Changes at the Same Time on the Shared Workbook
Sometimes some users edit a specific cell at the same time. Excel will apply the change based on which is saved earlier. So for the last user who is editing that cell, the Resolve Conflicts window will open and they can accept one of the changes.
Also, you can use the Advanced tab from the Share Workbook dialogue box to change the setting for conflicting changes between users.
- Go to the REVIEW tab from the ribbon.
- Select the Share Workbook.
- Click on the Advanced tab.
- There are two options for the Conflicting changes between users:
- Ask me which changes win
- The changes being saved win
- Press OK.
Remove User
If you need to remove someone, go to the REVIEW tab, in the Changes group click on the Share Workbook, on the Editing tab, select the user and press on the Remove User button, then press OK.
Notice that if you want to delete someone, you should change the network setting. Removing users from the Share Workbook dialogue box only removes them from the online workbook, and they can open it again and make changes.
You can connect with us and ask our experts for your inquiries and get more Excel Support Services.
Reduce costs, accelerate tasks, and improve quality with Excel Automation Services.
Our experts will be glad to help you, If this article didn’t answer your questions. ASK NOW
We believe this content can enhance our services. Yet, it’s awaiting comprehensive review. Your suggestions for improvement are invaluable. Kindly report any issue or suggestion using the “Report an issue” button below. We value your input.


