How To Add Footer And Header In Excel
Headers and footers can define your Excel file while you print it. They can show page numbers, file names, dates, or any other information you like to have on your printed file. If you don’t know how to a add footer and header in Excel, follow this post. You will see how simple it is.
Please note that headers and footers are only visible in Print Preview and Page Layout View. You won’t see them in Normal View worksheets. But if you add a footer and header in Excel, they are in your file until you remove them. We will also let you know how to edit or remove the footer and header in Excel.
If you’re preparing your worksheet for printing, you might also want to add, remove, or print gridlines in Excel to improve readability and formatting.
While headers and footers are great for adding context and structure to your Excel files, you might also want to include visual indicators within your data to make it more actionable. For instance, adding check marks is a simple yet effective way to track completed tasks or highlight important items in your spreadsheet. Learn the step-by-step process in our detailed guide on how to add a check mark in Excel.
How to insert header in Excel
- Open your file and select the sheet you want to add a header to.
- Go to the Insert tab and click on Header and Footer, which is in the Text group.
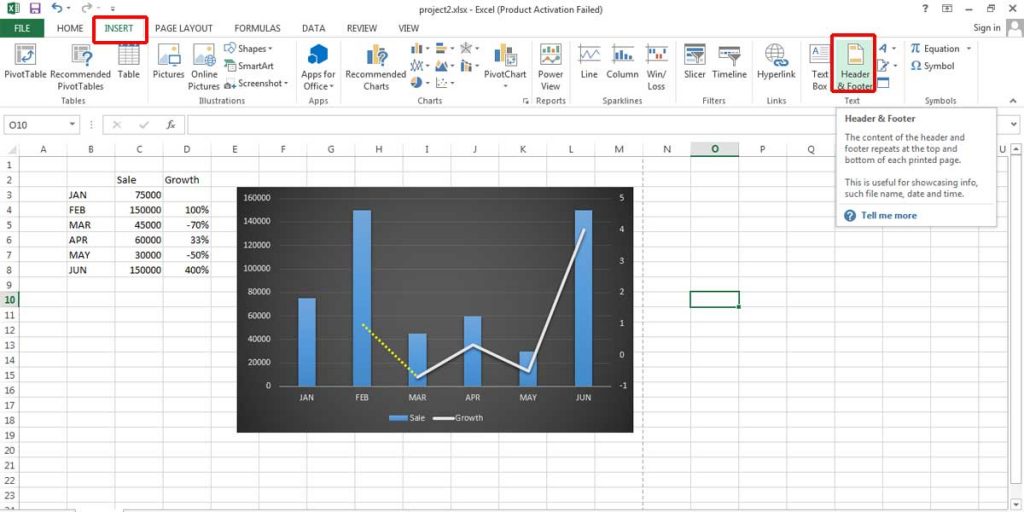
After clicking on Header & Footer, your worksheet turns into Page Layout View. Here you see where you can put your header.
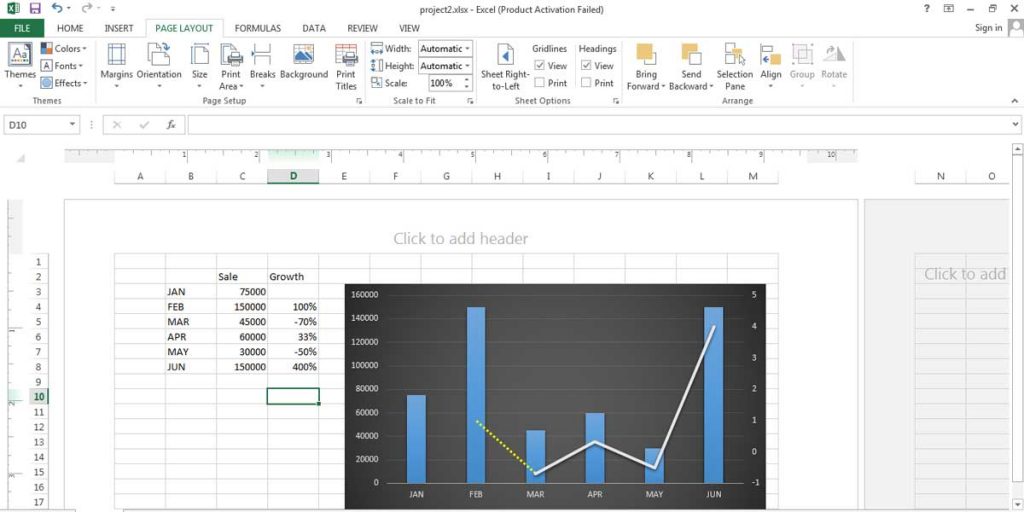
Usually, your Page Layout will be in portrait mode. If your file is landscape, go to the Page Layout tab and click on Orientation, simply change Portrait to Landscape.
*Please note that it’s important to have the right orientation before printing your page.
- This step is so clear you just need to click on top of the page where you see “Click to add header” has been written. The header has three sections. Click on the division you want to add a header. You can fill all three sections or use one of them. That depends on your preferences.
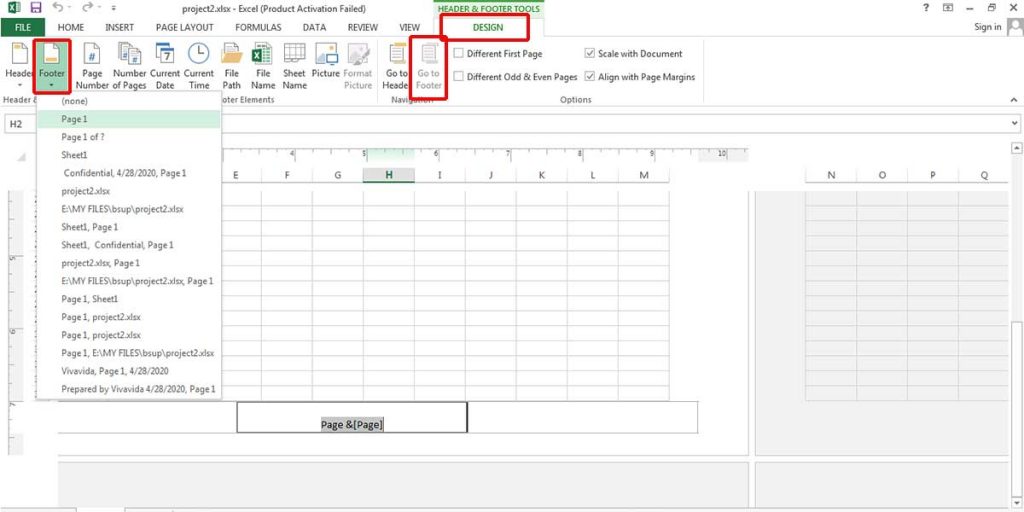
- Choose from the list which opens under the Header (top left of the page) in the Design tab. You can also simply type any information you want to show on the header.
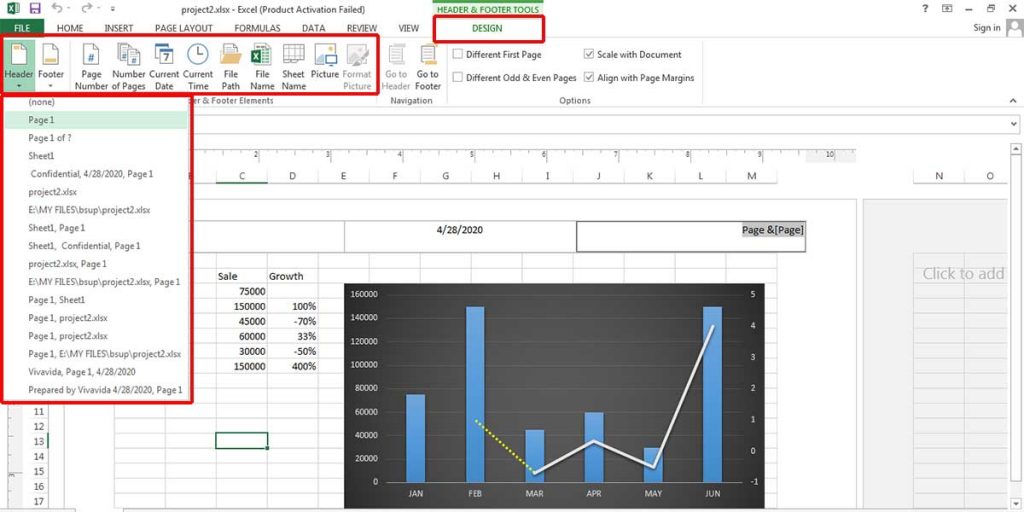
- Whatever you write on the Excel header will be shown on every page of the same sheet. But if you want to add a header to another sheet, you can either follow this instruction again, or press Ctrl and select the sheets you want to have the same header and footer. Then start inserting header and footer in Excel.
Boost your productivity by getting a free consultation from Excel experts, and discover tailored solutions to optimize your data management and analysis.
How to change header on Excel
You can change and edit the Excel header whenever you want.
- Open your Excel file.
- Go to the View tab and choose Page Layout in the Workbook Views group.
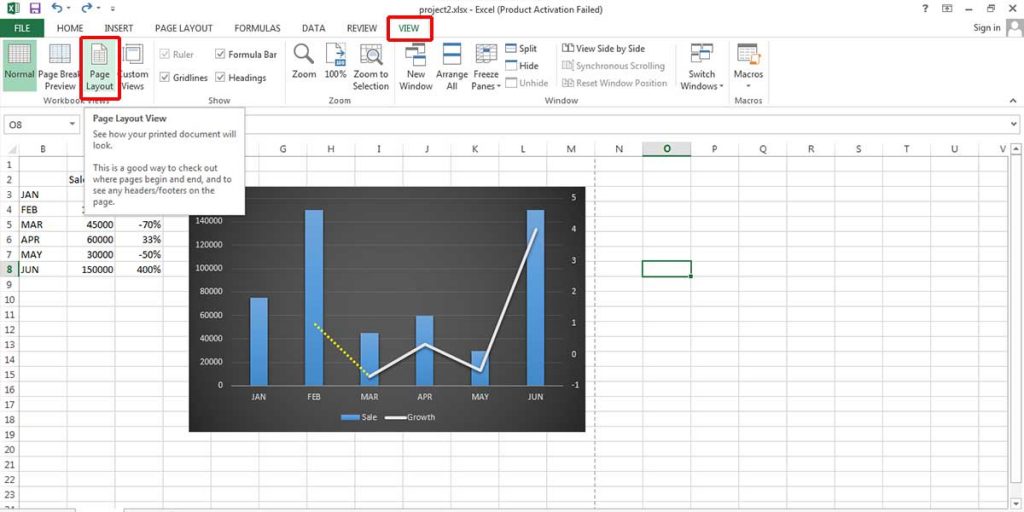
You will see your sheet in Layout view, in which the header is visible.
- Click on the header, delete or change any information you like.
- If you don’t want to have a header anymore, go to Design> Header and select none. It will clear all the sections of the header.

Enhance your productivity and efficiency with our comprehensive Excel Automation Services, designed to simplify complex tasks and save you valuable time.
How to add a footer in Excel
Inserting a footer in Excel is as simple as inserting a header. You should follow the same instruction.
- Go to the Insert tab, click on Header & Footer.
- In the Design tab, click on Go to Footer.
The footer is precisely like the header. It has three sections, and you can add all the elements you could add for the header.
How to change or remove footer in Excel
Follow the instructions about editing or deleting a header in Excel.
Options on Header & Footer Design Tab
There are different options on Design Tab while you are adding a header or footer for the Excel sheet. We are going to explain them briefly.
- Different First Page: if you want the first page of your Excel sheet to have a different header or footer, fill this checkbox. Now you can add another header just for the first page.
- Different Odd & Even Pages: fill this checkbox if you want your pages to have different header and footer on odd and even pages. Therefore, you will set a header and footer for odd pages and another for even pages.
- Scale with Document: if you fill this checkbox, the header and footer will change according to the page size.
- Align with Page Margins: this option will also fit the header and footer in the page margin. Therefore, while you print the page, everything will be in the right place.
Add header and footer from Page Layout
There is another method for adding header and footer in Excel.
- Go to the Page Layout tab and click on the small arrow on the bottom right of the Page Setup group. A window will display.
- Click on the Header/Footer tab.
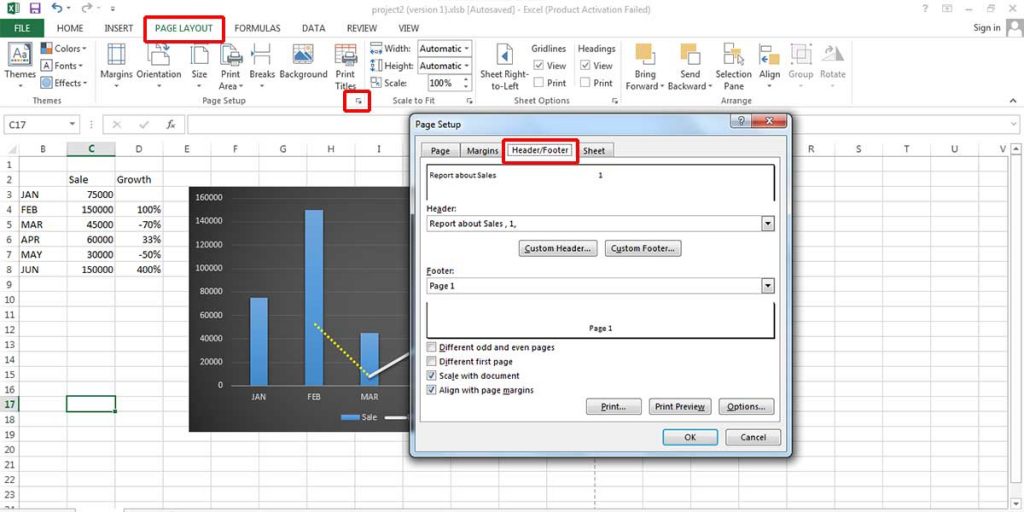
- If you want to add a header, click on the Custom Header button, and if you want to add a footer, choose Custom Footer.
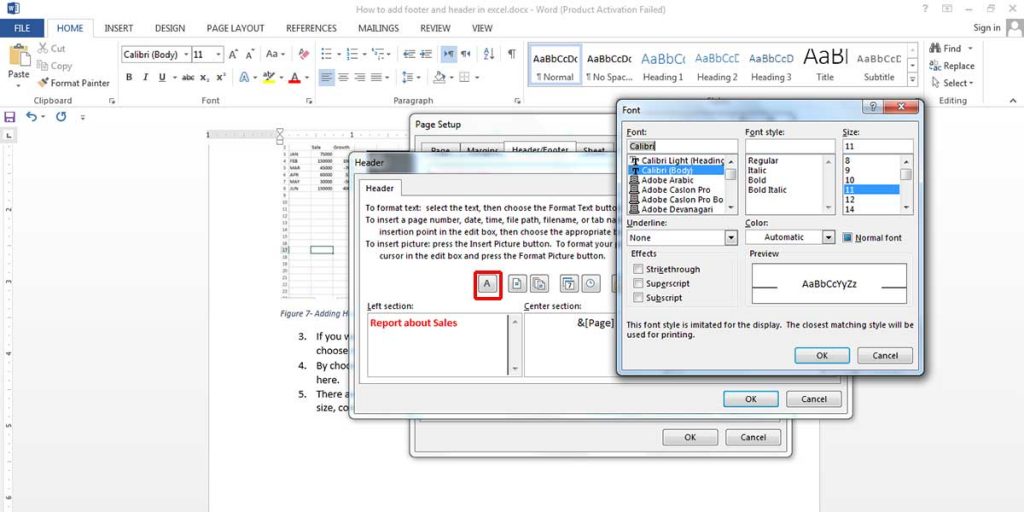
- By choosing either of them, another window will show up. You can pre-set headers and footers here.
- There are more options here to customize your header and footer. You can change your font size, color, effects, and style.
To see the result of these changes, press the Print Preview button.
Bottom Line
Inserting a header and a footer in Excel is so simple. If you learn how to add a footer and header in Excel, you can make better reports on Excel. Headers and footers can make your document more organized, and while printing the file, you can easily see the important information about it on the header or footer.
If you are a beginner to Excel, we recommend you to read the Complete Guide To Excel Basics.
Our experts will be glad to help you, If this article didn’t answer your questions. ASK NOW
We believe this content can enhance our services. Yet, it’s awaiting comprehensive review. Your suggestions for improvement are invaluable. Kindly report any issue or suggestion using the “Report an issue” button below. We value your input.


