How To Sort Alphabetically In Excel
In this guide, I am going to show you how to sort alphabetically and keep the rows together in Excel 2019. This should be fairly similar for 2010 and 2016 versions. However, there might be some differences in the older versions.
There are two methods in which you can sort alphabetically in Excel. One is more automatic, and the second one, more specific.
Method one: General
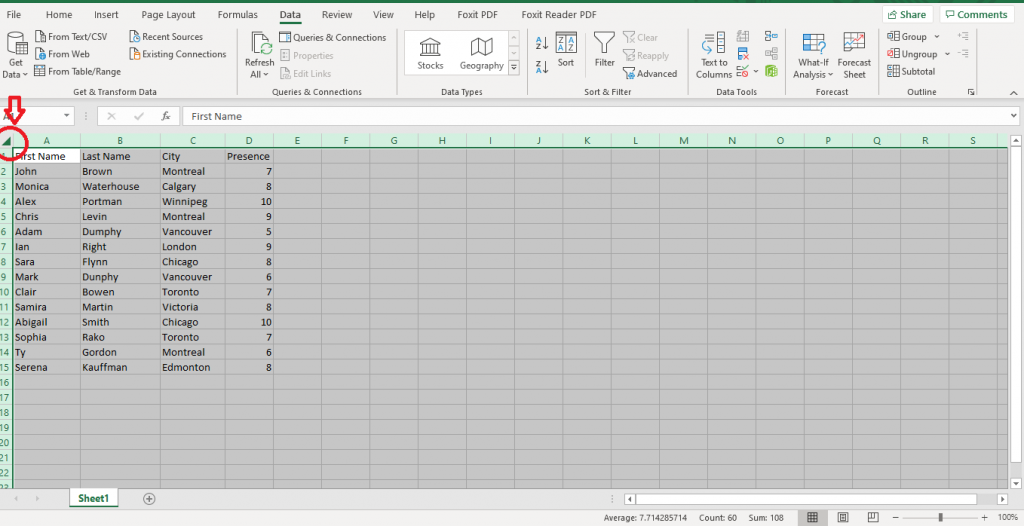
To begin with, you can either select the entire workbook by clicking on the little corner square, and it highlights everything.
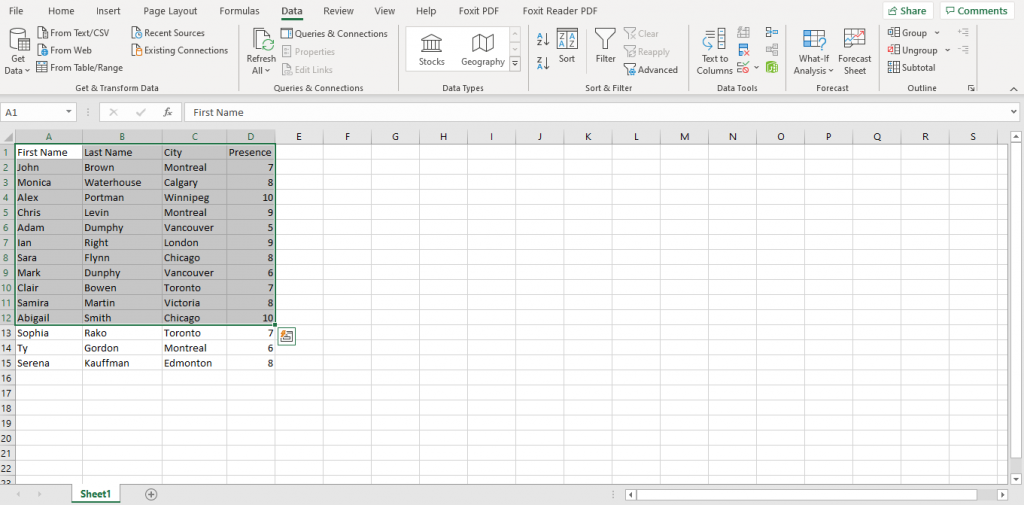
Or select only a specific section by a left click on the first cell and highlight the section you want.
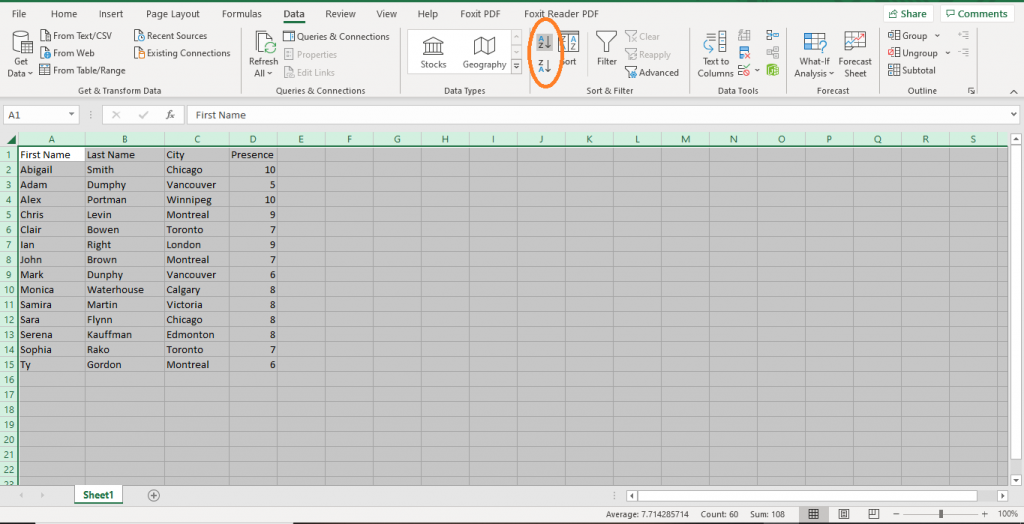
After selecting the sections you want in your Excel worksheet, click on “Data” then go to the Data ribbon. There are two options which are quicksort. If you click on the top one [A to Z], it sorts in ascending order, and the bottom one [Z to A] sorts automatically into descending order.
Unlock valuable insights with our Data Visualization and Data Analysis Services, transforming complex data into clear, actionable strategies for informed decision-making.
Method 2: Specific
Now, if you want to be a little more specific about how you want to sort your data, you can use the following method. Maybe you want to sort your data by first name then by city etc.
First, select the section you want on your sheet and click on Sort. The Sort dialog box will appear.
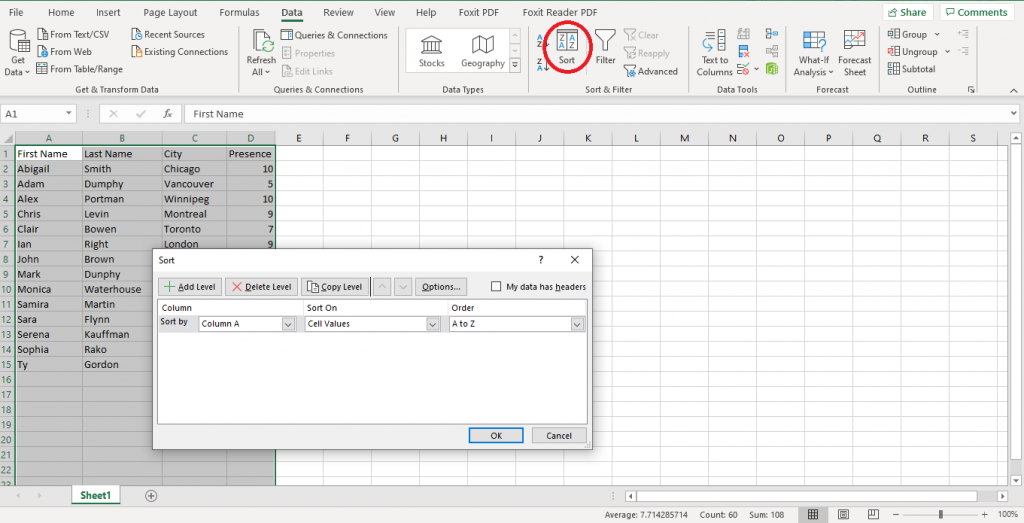
Depending on your data, it may or may not check the data header box on the top right corner. If you have headers, which are the descriptive titles on the top row, you check the ‘My data has headers’ box to exclude the header from the selections.
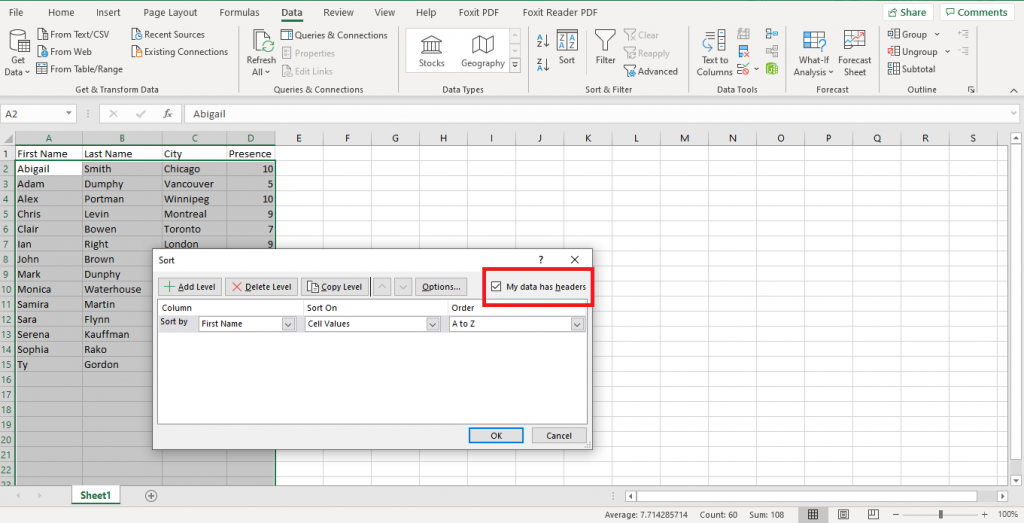
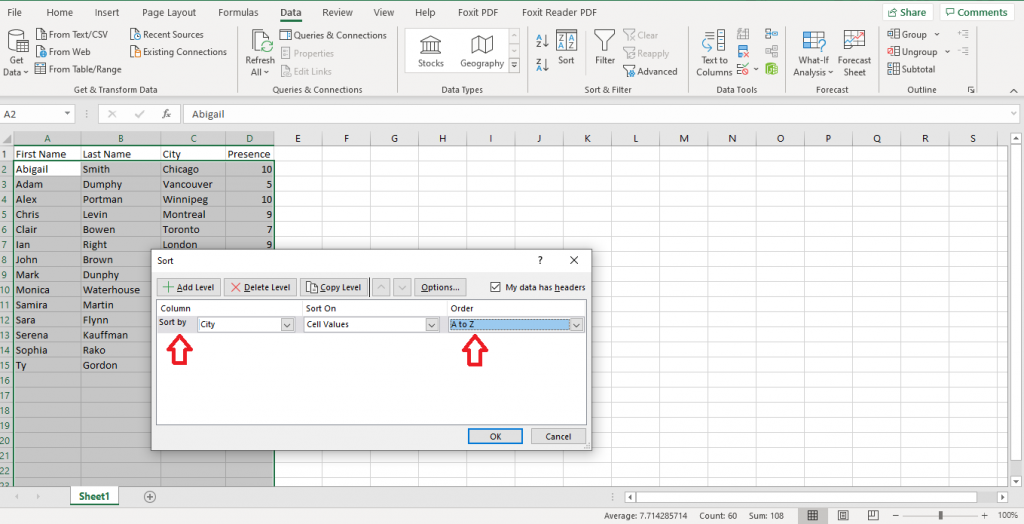
Now, you can select what you want to Sort by: maybe you want to Sort by city, so you select city, then you can change the Order option, AtoZ or ZtoA, etc.
So, you have sorted your data by city, and you want to sort it by first name. All you have to do is to Add Level; select first name and choose the Sort option you want. You can add several levels.
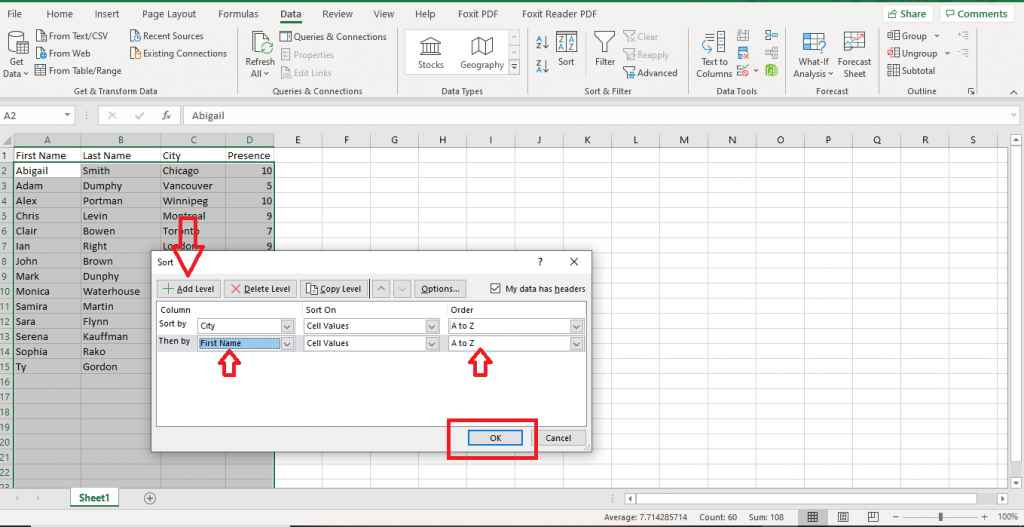
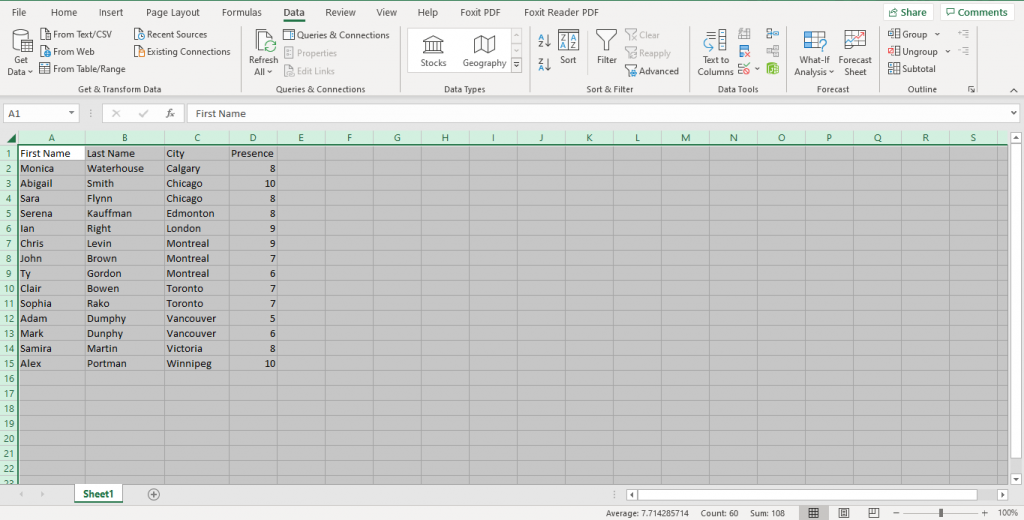
Once you make your selections, you click Ok. You are now back to your spreadsheet, and it is sorted out alphabetically first by city and then by first name.
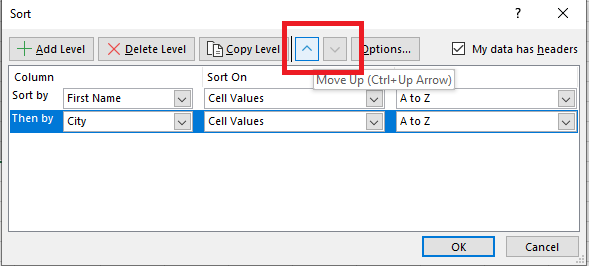
Tip: You can change the order of the levels by simply selecting the column, then clicking on move up or move down button.
This is how you alphabetize columns in Excel and keep the rows together. I hope you found this guide helpful. If you’d like to learn the basics about Excel don’t forget to check out our ‘Complete Guide to Excel Basics – Introduction to Excel with Examples’. You may also find our blog on ‘How to split cells in Excel’ helpful.
If you are looking for Excel customization solutions and support, make sure you check out our Microsoft Excel Consulting Services and Excel Support Services.
Our experts will be glad to help you, If this article didn’t answer your questions. ASK NOW
We believe this content can enhance our services. Yet, it’s awaiting comprehensive review. Your suggestions for improvement are invaluable. Kindly report any issue or suggestion using the “Report an issue” button below. We value your input.


